

When I first tried the Pour/pull through soap technique during the Soap challenge club of 2019, I learned that it was a technique that came from the painting world (acrylic pour painting), and have always seen it done as a vertical upward pull.
During the soap challenge, we were encouraged to do repetitive patterns in the screens (the advanced challenge required a DIY screen) and the pour was done from side to side with alternating colors. I want to say that it was then around that I saw the first example of a pull screen in a round column mold (in a pringles can) in a video by Marie Mousse. One of the winner soaps, if I recall correctly, was made in a column round mold as well, an impressive flower design or kaleidoscope design by Love your Suds. I actually just found the link and you can see it here. It seems that more precise results are achieved if the soap colors are layered evenly, which is why pouring with condiment bottles or with a funnel is very popular if using a column mold.
Lately, I have found the process of layering the colors for this technique in the mold to be more time consuming than desired; and if done on a loaf mold, quite challenging. so I had been thinking of whether it could be done in combination with a soap divider, like the one used for the Taiwan swirl technique, since it seems faster to pour that way, though the layers are thicker. (Unless I use more dividers)
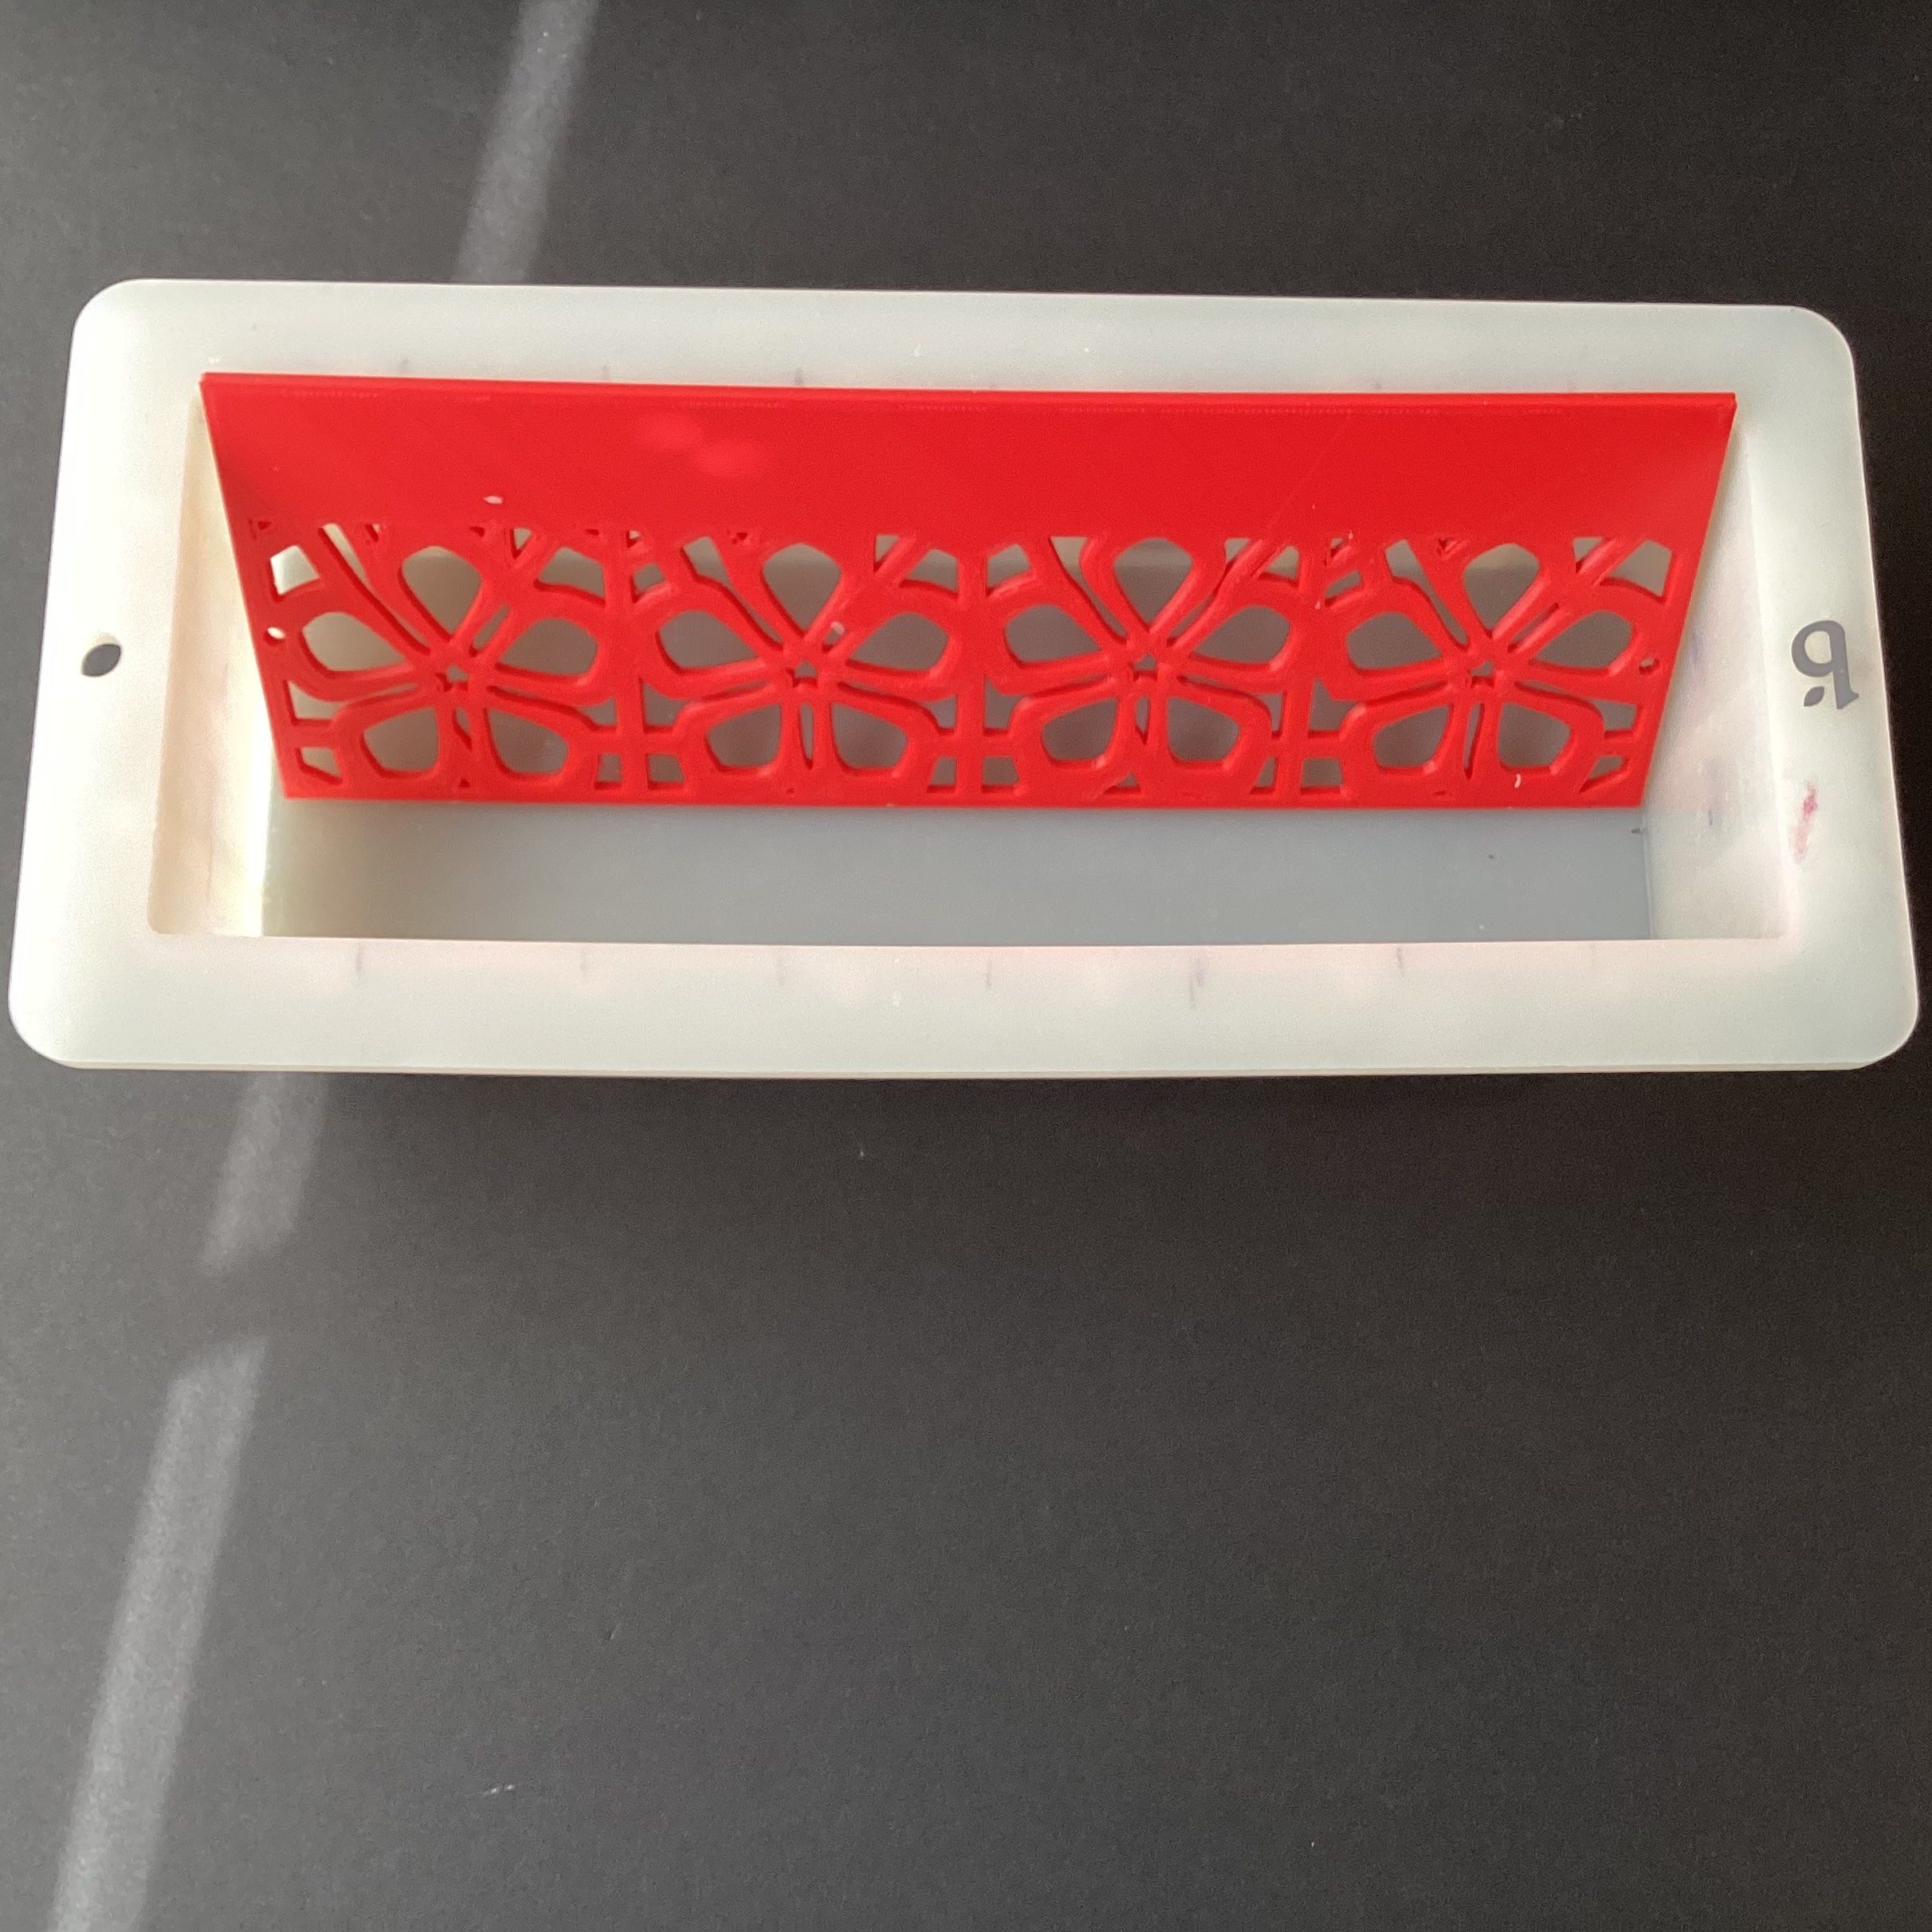
To find out if this would work, I made a soap in a tall and skinny mold with a rectangular floral pull screen, but I did not pull it up, rather I placed it vertically, sitting on its thin edge and against the long wall of the mold, and slid it or moved it from one side to the other with my hands. When trying to figure out if there was a name for this, I could not find it. So for now I am calling it the slide pull screen, if you have seen this before and know the proper name, let me know below.
I was actually pleasantly surprised with the results, you can watch the video of the making here, and if you scroll down below, there are some pictures of the soaps along with recipe.
Horizontal Pull screen
This got me thinking on what would happen if I made a small screen and moved it from left to right instead. I figured the dividers would need to be in the opposite direction then. Turns out this has already been tried, though there are not many videos (perhaps I am not searching for the right term). In the videos I found it is called the Horizontal pull screen, where you move a screen from one end of the mold (the narrower end) to the opposite end, the screen is about the size of the soap bar itself (in one video a spatula was used, actually). I am looking forward to trying that soon!
My first experiment of the Slide Pull Screen
Needed Ingredients
| Ingredient | Gram(s) | Ounce(s) | Pounds(s) | Oil % |
|---|---|---|---|---|
| Coconut Oil, 76 deg | 260.82 | 9.20 | 0.58 | 23% |
| Ricinus Oil (Castor Oil) | 68.04 | 2.40 | 0.15 | 6% |
| Karite Butter (Shea) | 124.74 | 4.40 | 0.28 | 11% |
| Olive Oil – All Grades | 351.53 | 12.40 | 0.78 | 31% |
| Tallow, Beef | 306.17 | 10.80 | 0.68 | 27% |
| Cocoa Butter | 22.68 | 0.80 | 0.05 | 2% |
| Ingredient | Gram(s) | Ounce(s) | Pounds(s) | Batch % |
| NaOH (5% Superfat) | 149.02 | 5.26 | 0.33 | 9.19% |
| KOH (5% Superfat) | 11.03 | 0.39 | 0.02 | 0.68% |
| Water (34% Lye + 66% Water Solution) | 310.68 | 10.96 | 0.68 | 19.17% |
| Total Oils | 1,133.98 | 40 | 2.50 | 69.95% |
| Soap Weight (Pre-Cook) | 1,621.06 | 57.18 | 3.57 | 100% |
Custom Additives
| Add with the Fats | ||
|---|---|---|
| Rosemary oleoresin (you will need jewelers scale or small precision scale) | 0.02 oz | 0.46 g |
| Add at trace | ||
| EDTA solution (mixed 50/50 with distilled water) | 0.44 oz | 13 g |
For more information on these additives you can click in the links below, please note above links are affiliate ones
- Rosemary oleresin (My oils already had this added when I masterbatched the oils)
- Tetrasodium EDTA
Skill Level
Medium to advanced. You need to be able to recognize when soap is at emulsion and light trace. And how to force gel phase. Also have the patience to wait until the soap batter reaches trace on its own (10-20 minutes for this recipe)
Colorants:
- 1/2 tsp Synergy from Nurture Soap for 1/4 of the soap or about 12 oz
- 1/2 tsp of Purple Vibrance Mica for 1/4 of the soap “ “
- 1/2 tsp of Berry Twist Mica “ “
1/2 tsp of Shimmering White Mica
Mold:
- Tall and skinny mold liner and mold
- or you could use the 10″ Silicone loaf mold from Nurture Soap with the right sized pull screen.
- Or you can use the square’ish mold like this one
Fragrance:
2 oz of Lavender fragrance oil from Lone Star candle
Equipment
- List of regular equipment
- Long and skinny spatulas
- Floral Pull screen for loaf mold
- or Floral Slide pull screen for 10” mold or for whichever size mold you need
- Mold dividers (depending on mold size, this is for the 10” loaf mold, and this one for the square’is one.
- Funnel containers
Safety Equipment:
- Nitrile gloves
- Facial Shield (I use either a facial shield or the goggles below)
- Safety Goggles
- Respirator (I use this when mixing the lye, I mix the lye in the window sill, window opened, with a pedestal fan blowing the fumes away, better yet, freeze your distilled water prior) I also try to wear long sleeves, pants and closed shoes. In my personal experience, most of my near misses (when I feel my skin itching or a slight burning sensation), or when I come contact with the soap batter, have happened when I am wiping down the containers, when I am almost done.
Process

- First, prepare the screen and the dividers inside the mold. The screen should be against one of the long walls. Or you can add the screen after pouring the soap colors.
- It is a good idea to mix the micas with olive oil or any clear oil, and measure the fragrances. I use Long and skinny spatulas to do this.
- To make the soap, I normally heat up some of my masterbatched oils, weigh what I need and set it apart.
- Then I measure the masterbatched lye needed. However, if you do not masterbatch the oils or lye, I detail it below:
- In a well ventilated area (outside or by an open window), add the lye gradually to the distilled water. Do not breathe the fumes. You can freeze half of the water ahead to avoid fumes, and weigh the ice cubes. You need to wear your safety gear. Lye burns! You can prepare this several hours ahead, or even days ahead, keep it properly covered. (If making it the same day, loosely cover it to allow it to cool down. Once at room temperature, use an airtight lid).
- While you wait for the lye water to cool down, you can weigh and melt your oils. Weigh your fragrance oil or essential oils into a glass container or ceramic container (fragrance oils can dissolve thin plastics).
- When your oils and lye solution are at or below 105°F (37.77°C), or if your recipe is like mine and has 60% of solid fats, let the oils cool down to 85 F or 30 C. put on your PPE (Personal protective equipment) again, and add your lye solution to the oils slowly, to avoid splatters pour it on the blender shaft. If your lye solution is cooler than this, is ok. As long as it not near freezing. (Room temperature is fine).
- Stir with the blender on Off position initially, then blend for 5-7 second periods, alternating with stirring for 10 seconds or longer, until it is emulsified. This takes about 30-50 seconds total with this recipe. When a recipe reaches emulsion, everything has a uniform, lighter color than before, you do not see the darker oil swirls when blending.
- Add the fragrance and stir with spatula for about one minute
- Distribute the soap batter among the funnel pitchers and stir the color for each
- Let the soap batter rest for 15-20 minutes until it has come to light trace on its own.
- Pour each color in alternating spaces from the dividers.
- When done pouring, pull the dividers out, scrape carefully any leftovers clinging to the divider. If you did not add the screen prior, add it now. Position it along one of the long walls of the mold carefully.
- wait 5-10 more minutes
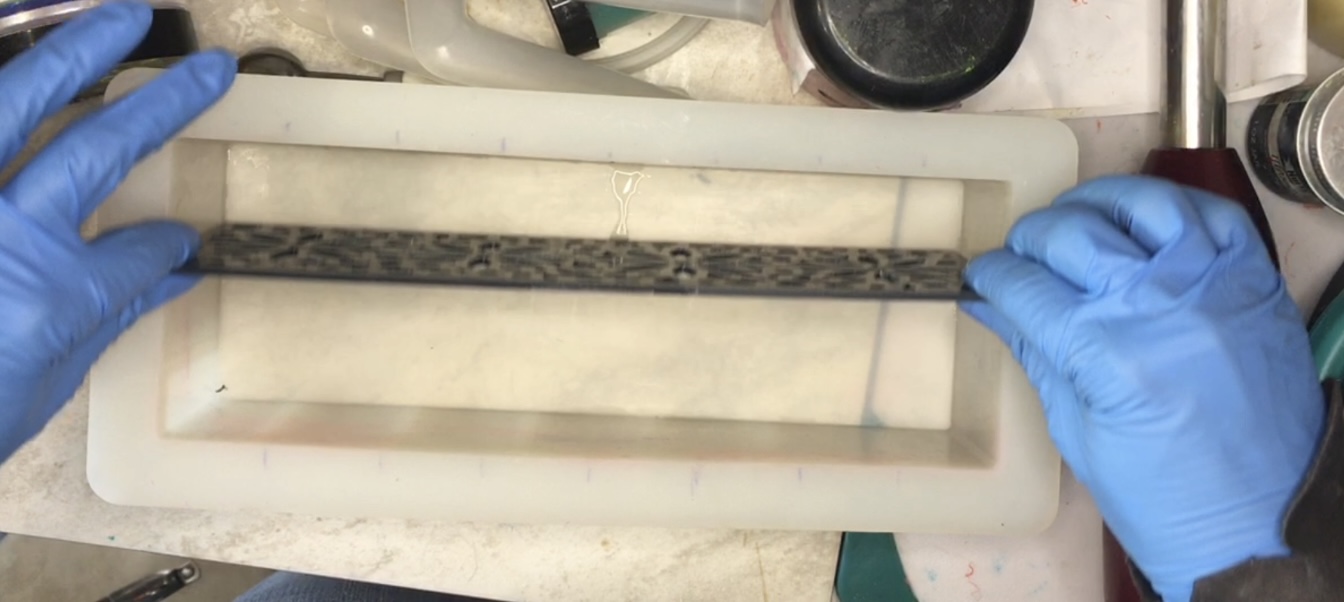
- Hold the edges of the screen and move it slowly to the opposite side, and pull it out upon reaching it.
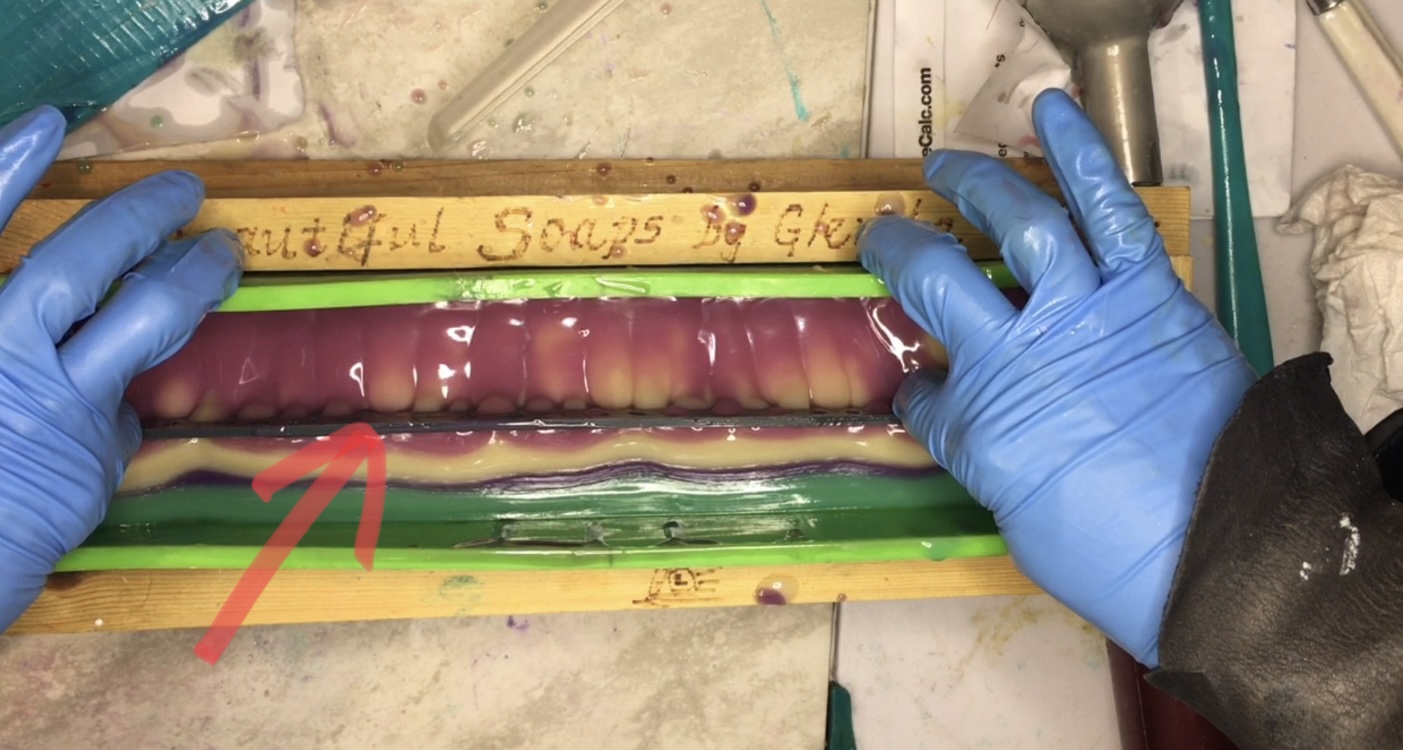
- Cover with plastic to avoid soda ash or 99% isopropyl alcohol. I got soda ash with this soap because I did not cover it myself, but I planed it off. I tried to promote gel phase by putting a heating pad on the floor, putting some protective paper, then the soap mold on top, putting a box on top or another cover type, and covering it with a blanket. I left the heating pad on for 5 hours or so, on High. Then turn it off.
- Wait 18-24 hours hours to remove, then divide the loaf mold in 4 sections 2.5″ wide each. From each portion you will get 2 soaps if using a tall and skinny mold, or 3 square soaps, if using the 10” loaf mold. but you need to cut them differently (not like bread slices, but like if you were cutting square cake pieces, and then diving taht in 3 (check video for a better visual explanation)
- Let the soap cure for at least 4 weeks in an open area protected from direct sunlight before using. (not touching any metal)
Some concepts explained:
*SUPERFAT:
By now you probably know that lye (sodium hydroxide) converts oils into soap, through a process called saponification. And you probably also know that there are specific amounts needed of each for this to happen. Because each soap has a different SAPonification value, different amounts of lye are needed for each oil.
Superfatting sounds like something I like to do to myself when I keep eating after I feel full. But in the soap world, many will know it is when you either add more oils or less lye than it is required. Let’s say, hypothetically, that you need 3 oz of lye to convert 16 oz of manacao oil (totally made up oil) into soap. If you only use 2.5 oz of lye instead of 3, that means that a percentage of the manaco oil will not become soap, but will remain an oil. And this is desirable as that extra oil will cause the soap to become more gentle on your skin, by reducing its cleansing ability slightly. But if you use 4 oz of lye instead of 3, that means all 16 oz of manacao oil will become soap, and not only that, there will be extra lye floating around. That extra lye will be looking for more oil to convert to soap, that oil could be the natural skin oils, which means this soap can burn or irritate the skin.
Usually superfat of at least 3% is recommended as oils properties may change from crop to crop. But even if you had a 0% superfat soap, it would still be gentle as handmade soap creates glycerin, which is a skin humectant. (From most commercially produced soap, glycerin is removed to be sold separately).
*LYE CONCENTRATION / WATER DISCOUNT:
Most soap calculators will give you the amount of water needed to mix the lye with, based on traditional cooking methods of making soap, what we now know as hot process. This is a big percentage of water (38% of the oils) because a lot of it would evaporate through the cooking process. However, for cold process soap this is usually too much water, which can lead to a lot of soda ash or a lot of shrinkage during the cure.
This blogpost explains it better (from modern soapmaking).
