
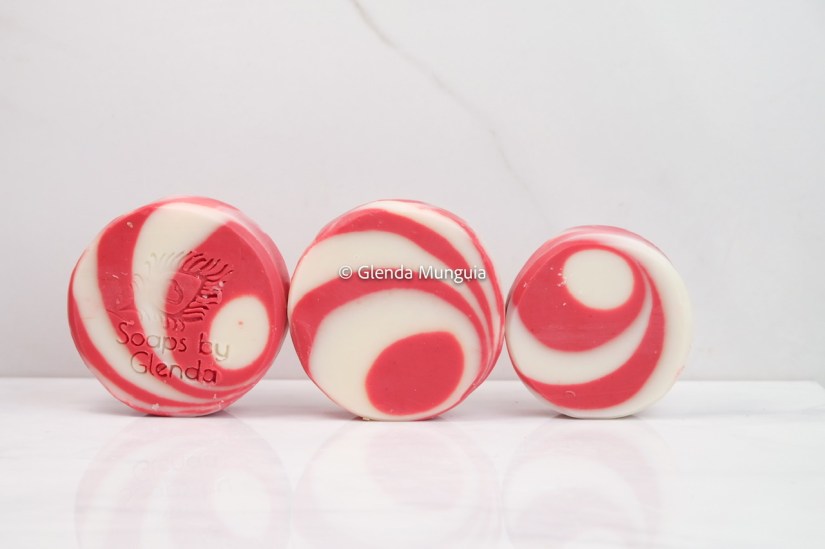
If you make soap, sooner or later you will find you have accidentally made meat soap. For me, it happened early on, I was making a peppermint scented soap and I did not have the right red colorant, so I used a dark red pigment which swirled with the white color, looked like a nice marbled raw steak. I have been wary of mixing those two colors in soap ever since. However, after trying the lollipop swirl technique as part of a challenge, I thought that the same technique would work well to make a peppermint candy soap and here we are.
I also wanted to try using a silicone beaker as a mold; and while it worked well, it did leave some indentations on the side from the measurement marks. Most of the soap was made in a PVC pipe though.
I had the opportunity of bringing these soaps to a Christmas craft show, and I found that people either love or hate the peppermint scent. Most of the the people loved it though, and I almost sold out of this soap.
Here are the ingredients and supplies used:
My affiliate links:
Several of the links above/below are affiliate links, as the ones below. If you buy from them, it will not cost you any more, and I would get a tiny commission on it. As amazon associate I earn from qualifying purchases.
Colorants:
2 tsps of Trial by Fire red mica. This mica does not bleed into the white, which is why I like it. It will also give you a strong red (if you use enough) even if you do not gel the soap; however, I did make this go through gel phase to make the removal from the PVC pipe easier.
2 tsps Winter White Mica when I use this mica my soap batter does not become thick the way it does with titanium dioxide. My soap recipe is fairly white to begin with though.
Mold:
I used a 3″ PVC pipe as a mold and this silicone beaker
Equipment
Safety Equipment:
- Nitrile gloves
- Facial Shield (I use either a facial shield or the goggles below)
- Safety Goggles
- Respirator (I use this when mixing the lye, I mix the lye in the window sill, window opened, with a pedestal fan blowing the fumes away, better yet, freeze your distilled water prior) I also try to wear long sleeves, pants and closed shoes. In my personal experience, most of my near misses (when I feel my skin itching or a slight burning sensation), or when I come contact with the soap batter, have happened when I am wiping down the containers, when I am almost done.
Recipe Totals
Please note that this recipe has a low superfat* percentage and a considerable water discount*. If you are a beginner, a recipe like this one might be better. I am also using a dual lye blend. If you only want to use sodium hydroxide, you will need to run this through a lye calculator, I like soapmakingfriend.com
Recipe Totals
| Liquid Required | 9.29 oz | 263.23 g |
| NaOH Weight | 4.42 oz | 125.32 g |
| KOH Weight | 0.36 oz | 10.28 g at 90% Purity |
| Lye Weight | 4.78 oz | 135.6 g |
| Oil Weight | 32 oz | 907.18 g |
| Fragrance Oil Weight | 2.4 oz | 68.04 g |
| Superfat | 2% | |
| Total Batch Weight | 48.97 oz | 1388.26 g |
| Lye Concentration | 34% | |
| NaOH / KOH Ratio | 95% / 5% |
Recipe Oils, Fats and Waxes
| Oil | % | Ounces | Grams |
|---|---|---|---|
| Olive Oil | 30 | 9.6 | 272.16 |
| Tallow Beef | 30 | 9.6 | 272.16 |
| Coconut Oil, 76 deg | 25 | 8 | 226.8 |
| Castor Oil | 8 | 2.56 | 72.57 |
| Shea Butter | 7 | 2.24 | 63.5 |
| Total | 100 | 32 | 907.18 |
Custom Additives
| Add with the Fats | |
|---|---|
| Rosemary oleoresin | 0.02 ounce |
| Add at trace | |
| EDTA mixed with water | 0.48 ounce |
For more information on these additives you can click in the links below, please note above links are affiliate ones
- Rosemary oleresin (My oils already had this added when I masterbatched the oils)
- Tetrasodium EDTA
Fragrance
2.4 oz of Peppermint fragrance
MAKING THE SOAP
- Prepare the PVC pipe (if using) by smearing petroleum jelly inside, and sealing one end (I have I 3d printed a cap, and then I put a plastic sheet that I secure with rubber bands, one of them is very close to the edge, sometimes I tape it in place instead.
- Normally I melt some of my masterbatched oils, weigh what I need and set it apart.
- Then I measure the masterbatched lye needed. However, if you do not masterbatch the oils or lye, I detail it below:
- In a well ventilated area (outside or by a window), add the lye gradually to the distilled water. Do not breathe the fumes. You can freeze half of the water ahead to avoid fumes, and weigh the ice cubes. You need to wear your safety gear. Lye burns! You can prepare this several hours ahead, or even days ahead, keep it properly covered. (If making it the same day, loosely cover it to allow it to cool. Once at room temperature, use an airtight lid).a
- While you wait for the lye water to cool down, you can weigh and melt your oils. Weigh your fragrance oil or essential oils into a glass container or ceramic container (fragrance oils can dissolve thin plastics). I masterbatch both the lye water solution and the oils, so I only need to weigh the amount needed each time (I do warm up the oils prior, but not the lye).
- Prepare your mica. Mix the micas with a little bit of olive oil into the funnel pitcher containers. Make sure they are large enough to hold half of the mix.
- When your oils and lye solution are at or below 105°F (37.77°C), put on your PPE (Personal protective equipment) again, and add your lye solution to the oils slowly, to avoid splatters pour it on the blender shaft. If your lye solution is cooler than this, is ok. As long as it not near freezing. (Room temperature is fine). If your oils go under 95° F, warm them up to lightly above 100° F
- Stir with the blender on Off position initially, then blend for 5-7 second periods, alternating with stirring for 10 seconds or longer, until it is emulsified. This takes about 30-50 seconds with this recipe. When a recipe reaches emulsion, everything has a uniform, lighter color than before, you do not see the darker oil swirls when blending. It is better to err on the side of the mix being under emulsion that it being at light trace. We will blend again to mix the colors.
- Add the fragrance and stir thoroughly for about 30 seconds
- Divide the mix in half, pour each half into the funnel pitchers with the colorants and stir them with a spoon or spatula. If by now the soap batter has not reached light trace (say, if you lift up the spoon and try to pour a tiny amount back to make a drawing on top, if you can see said drawing, it is at light trace)
- If you have not reached light trace yet, stick blend for 5-10 seconds, the white first, then the red. We are not trying to stick blend it to trace though. Wait until it reaches light trace on its own. If we force the light trace by stick blending, the mix will thicken up faster as we start the pour. We need the mix to stay at light trace for a long time.
- Pour a little bit of the white on the bottom of the mold, just enough to cover the bottom with a thin layer.
- Then do a “wall pour” with the red. This is when you align the end of the funnel pitcher to the inside wall of the pvc pipe, and you pour it so that the soap batter slides down the wall of the pipe until it reaches the bottom. You are looking to pour enough batter so that the red reaches the center of the pipe.
- Next do another wall pour with the white. This pour should start next to the previous pour, not on the same spot. You will be moving the pipe clockwise as you alternate the colors.
- If you have any leftovers, pour them in the silicone beaker, if using.
- Cover the soap to help promote gel phase. I put mine inside a carboard box carefully, and cover it with towels, sometimes I put a heating pad underneath. You need to make sure to handle carefully to avoid knocking it down.
- Wait 24-48 hours, when ready to unmold, put it in the freezer for one hour (if you have room). Then let it sit on counter for a few minutes and push on one end to help it slide out. I use a small jar that fits inside the PVC pipe. I put the jar on counter, then I push the soap down on top of it.
- To cut the soap into bars I used a single bar cutter.
- Let them cure for at least 4 weeks in an open area protected from direct sunlight before using. (not touching any metal)
*SUPERFAT:
By now you probably know that lye (sodium hydroxide) converts oils into soap, through a process called saponification. And you probably also know that there are specific amounts needed of each for this to happen. Because each soap has a different SAPonification value, different amounts of lye are needed for each oil.
Superfatting sounds like something I like to do to myself when I keep eating after I feel full. But in the soap world, many will know it is when you either add more oils or less lye than it is required. Let’s say, hypothetically, that you need 3 oz of lye to convert 16 oz of manacao oil (totally made up oil) into soap. If you only use 2.5 oz of lye instead of 3, that means that a percentage of the manaco oil will not become soap, but will remain an oil. And this is desirable as that extra oil will cause the soap to become more gentle on your skin, by reducing its cleansing ability slightly. But if you use 4 oz of lye instead of 3, that means all 16 oz of manacao oil will become soap, and not only that, there will be extra lye floating around. That extra lye will be looking for more oil to convert to soap, that oil could be the natural skin oils, which means this soap can burn or irritate the skin.
Usually superfat of at least 3% is recommended as oils properties may change from crop to crop. But even if you had a 0% superfat soap, it would still be gentle as handmade soap creates glycerin, which is a skin humectant. (From most commercially produced soap, glycerin is removed to be sold separately).
*LYE CONCENTRATION / WATER DISCOUNT:
Most soap calculators will give you the amount of water needed to mix the lye with, based on traditional cooking methods of making soap, what we now know as hot process. This is a big percentage of water (38% of the oils) because a lot of it would evaporate through the cooking process. However, for cold process soap this is usually too much water, which can lead to a lot of soda ash or a lot of shrinkage during the cure.
This blogpost explains it better (from modern soapmaking).

1 thought on “Peppermint soap”