
A while back, I had made a soap slab cutter with a fixed-height wire that I just tightened whenever needed. The problem with it, was that to change the height of the cut, I needed to use books, magazines, you name it, to adjust the height of the soap slab, since the wire could not be adjusted.
After a while I decided it would be worth it to attempt to make an adjustable height slab cutter, so here we are. Because my husband and I are a bit of wood hoarders, I had enough pieces of wood to pick from to make it. (We really cannot resist seeing good wood being thrown away, especially if we have a project coming up). Mind you that we do not have a “wood work shop” and are not wood workers, or carpenters, not even wood hobbyists; which is why I think of us more as wood hoarders than anything else.
Below are the materials and tools I used, and if you scroll down you can find the video of the making, and also an update after using it for a few weeks:
Wood:
- For the base: I had a 3/4″ thick, 7″ wide and 25″ long piece of wood. (though I wished it was wider, perhaps 10 x 25). I believe it was a piece of oak or some other wood I was gifted. Plywood would probably work just as well.
- For the walls: a 2×4 piece of wood. Out of which my husband cut three pieces: 2 pieces about 8″ tall each, and a small piece about 3/4″. However, if I was going to the store, I would rather buy/cut two pieces of wood, 1″ thick, 4″ wide and 7″ tall each (could be even shorter, depends of the height at which I want to cut the soap). My husband made a slit in the middle of each of these pieces. lengthwise, with a miter saw. But if I did not have access to a miter saw, then I would get this instead:
- Or: (Alternative for the walls): 4 pieces of wood 2″ wide, 7″ tall, 1 ” thick each. And I would put two of them really close together, next to each other, short sides together, to keep the wire in between them. (and repeat for opposite side)
- To hold the guitar wire tuner knob: A 3/4″ thick 2 x 4 piece or any other small bit of that thickness.
Other*:
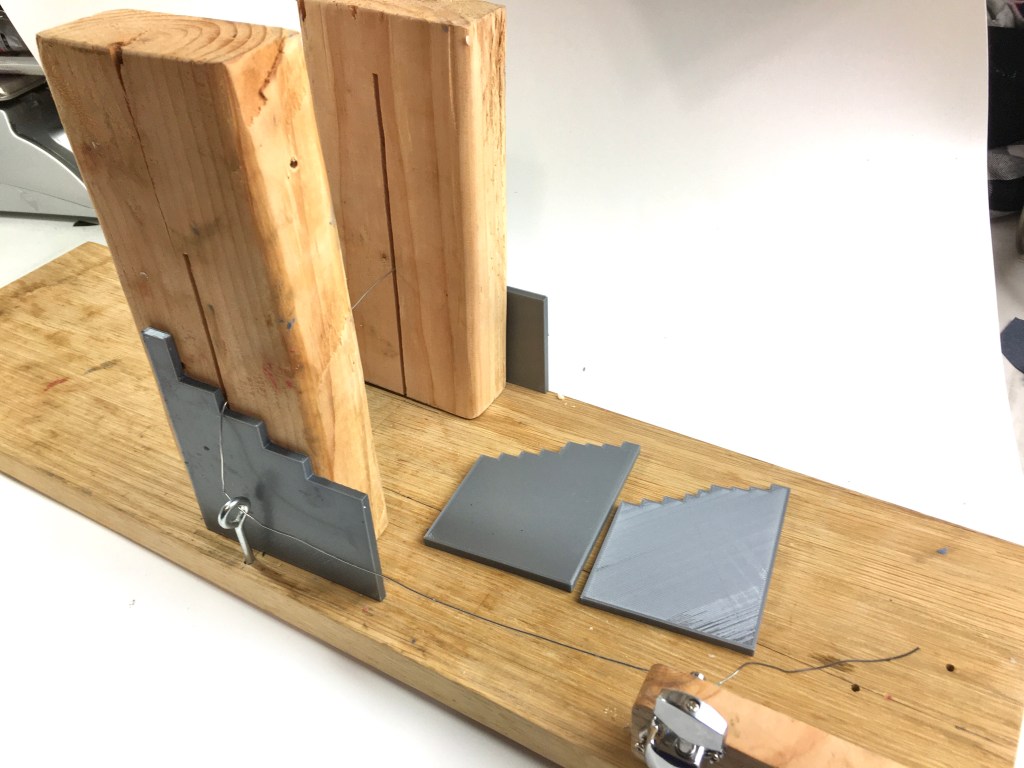
- Adjustable guides for log splitter: I 3d printed mine, you can get them in my Etsy Store. I also saw these ones from from workshop heritage. And I have also seen these ones in Etsy. I also have these and these available at the Store.
- Guitar tuning peg. I bought mine really cheap from Ebay. It took a month to arrive, there are others at a higher price that ship faster.
- Sanding paper (I used 220 grade)
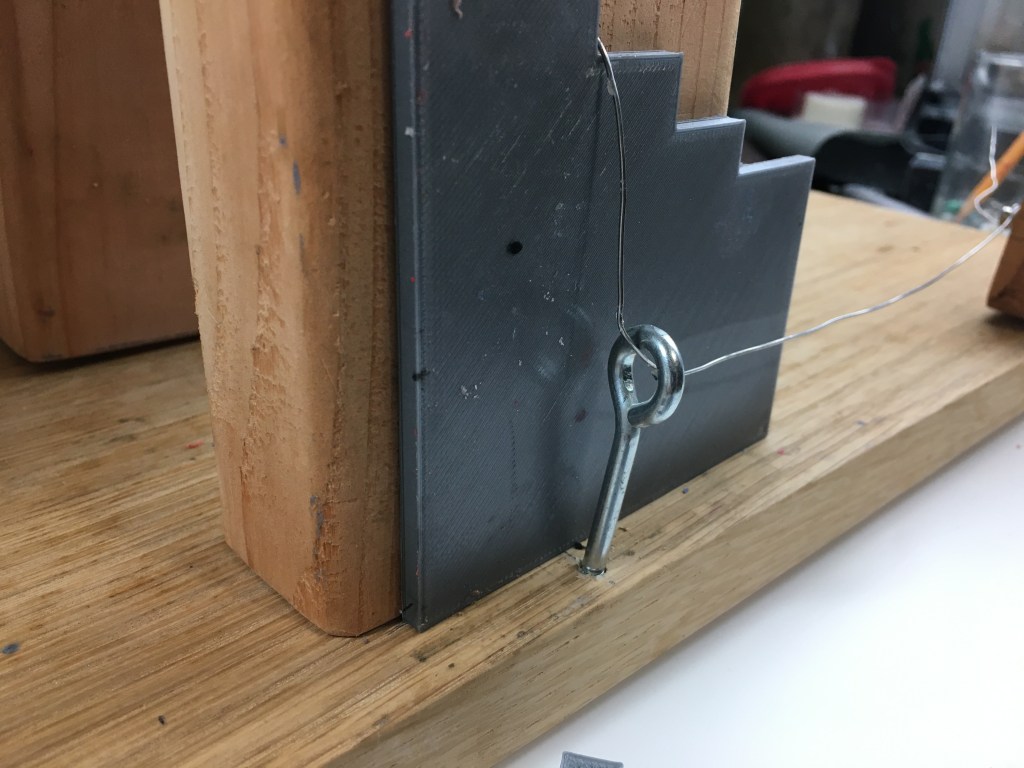
- Screw eye
- 3/4″ or 1″ screw to hold wire
- 22 gauge stainless steel or 24 gauge stainless steel (ideally guitar wire), the one I used is a bit too thick but it still works (20 gauge), For wire gauge, the higher the number, the thinner it is.
- Six 2″ flat head wood (for wood) screws: I used Drywall screws, #2 phillips 7 x 2-in. That is not what these screws are meant to be used for, but it is what I had. The important thing is the length given the thickness of my material.
*Please note that some of the links in this page are affiliate links, which help keep this blog running.
Tools:
- Miter saw (if you have it, it is not worth getting it just for this, I would use two pieces of wood instead as explained above)
- Drill
- Drill bit set (I used the 7/32″ for the guitar peg, and 5/32″ for the screws)
- Needle nose plier
- Wire cutter
PPE:
Video:
Update 1/16/21:
After using the planer a few times. Here are a few changes I would suggest:
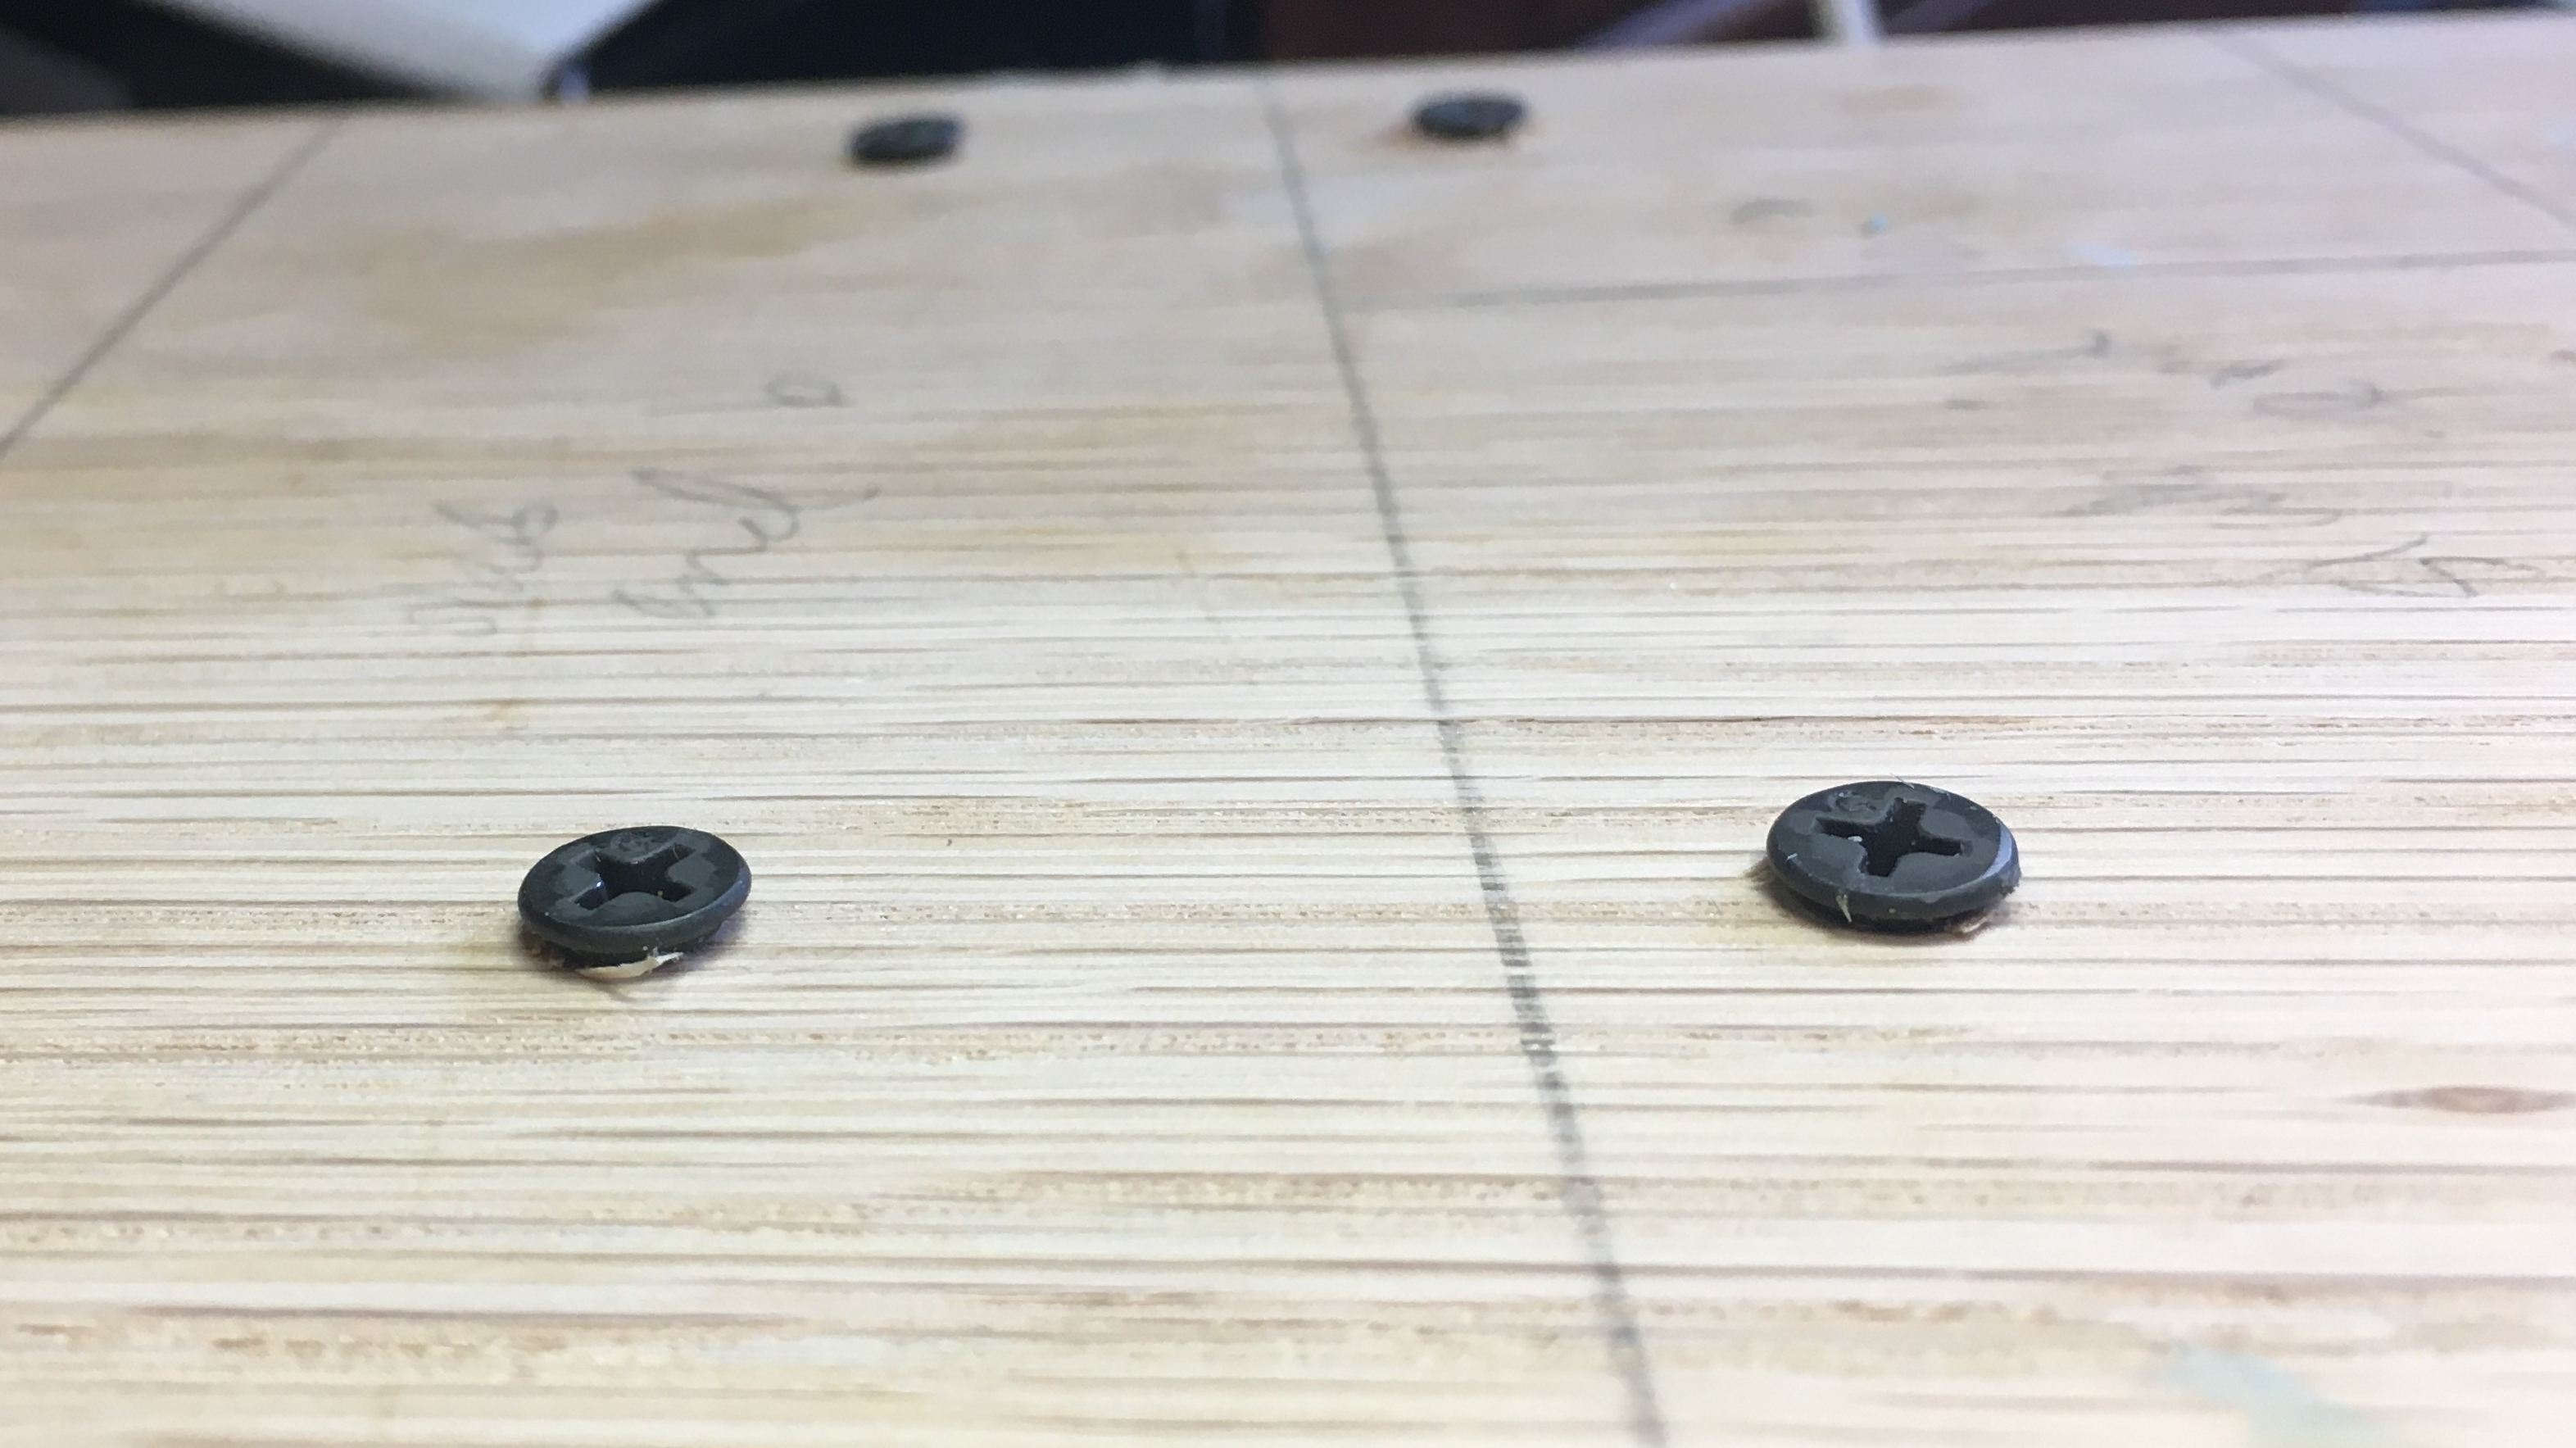
1. Make the screws flush at the bottom. Even though I used flat head screws, they still protruded above the surface of the wood under the base, which caused it move, like when a chair rocks if a leg is shorter. I did a google search for “how to make screw heads flush with wood” and found different ways to accomplish it. The cheapest way was to remove all the screws. Find a drill bit that matched the size of the head of the screws and drill that in the same hole for the screw, not very deep, just creating a cavity where the screw head can rest, and be flush or even deeper with the wood.

2. Consider adding a small piece of wood at the bottom on one end, like this one.
It is because that piece of wood sort of anchors the splitter to the edge table, to keep it from moving as you push the soap through. I think this can be easily added to my splitter, however; because of my workstation shape, I don’t think it’s possible for me, but definitely something for you to consider.
3. Gluing the wood prior. This helps a lot. Basically you would glue your walls to the base, and the wire holder to the base, before drilling or making any drill guide holes. Then, when you are ready to drill the holes, because the pieces are glued together, you can drill through the base and the walls at the same time, and insert the screws. Then you do not have to worry so much about measuring and matching the holes.

Thank you for sharing, Glenda. This is really helpful to consider for a future project. I will be sharing and saving this post.
LikeLike
Great! I am happy to hear that, take care!!
LikeLike