
I used to work at a company that had two buildings and a courtyard in between them. The courtyard had fountains and crape Myrtle trees around it. I used to walk between the buildings at least once a day.
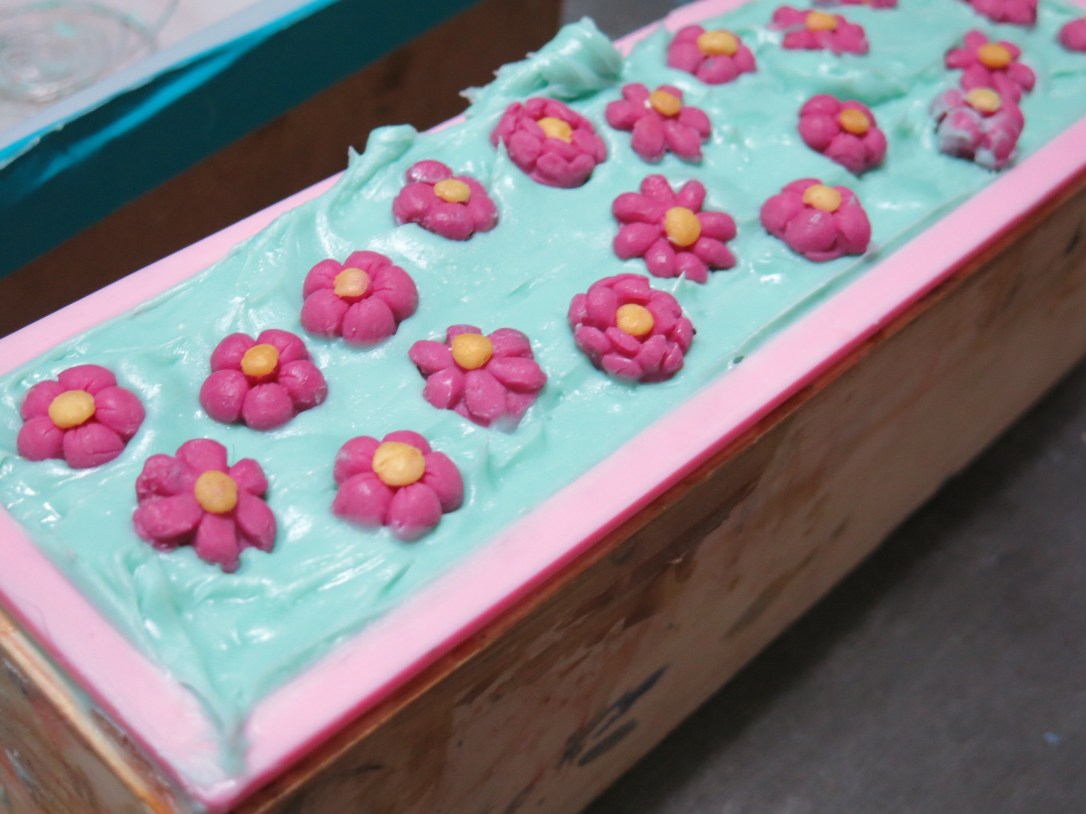
In the Spring and Summer, the trees around the courtyard fountains displayed bright fuchsia flowers that would eventually fall on the water. I used to think that the color combination looked great, and it inspired me to make jewelry around those colors. So now that I make soap, it made its way into one.
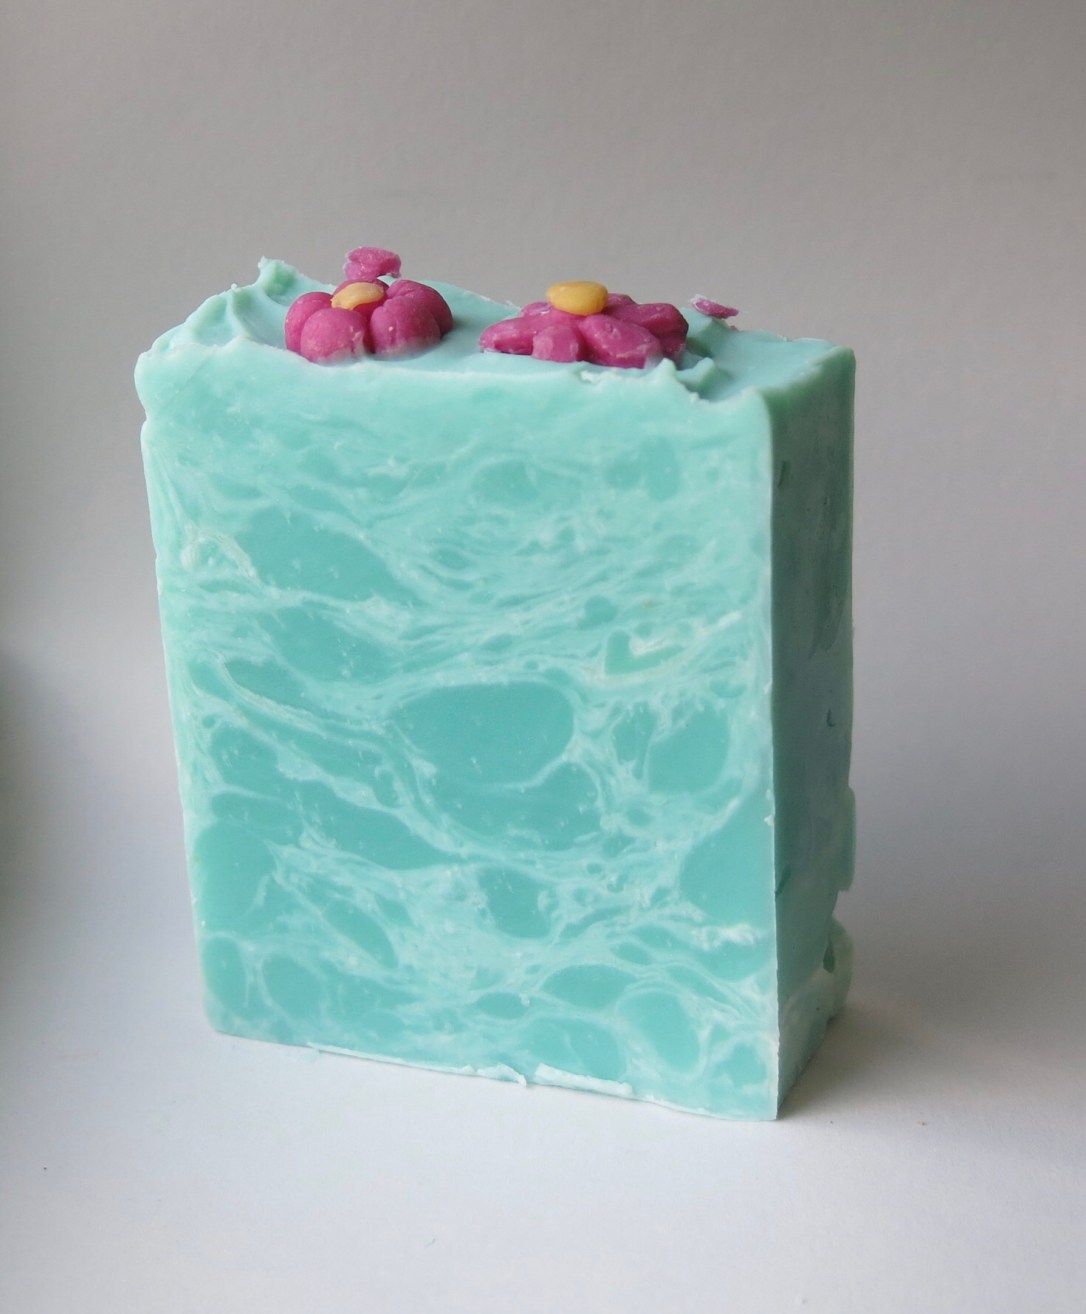
Since it would have flowers, I thought that a floral/girly fragrance would go well with it, and as you probably know, most floral fragrances accelerate. I thought I could overcome this issue working in low temperatures and being quick. I came up with a design that would work with that. However, said original design plan went quickly out the window as I lost 2 precious minutes to confronting an issue (the issue of not having enough batter for my mold). Despite this, I am actually quite happy with how it came out, and might even try to replicate it in the future.
Flowers at the Fountain
Soapmaker level: Intermediate
Tools Needed:
- Standard soap making tools and protective equipment
- 3 lb Loaf mold
Needed Ingredients
| Ingredient | Gram(s) | Ounce(s) | Pounds(s) | Oil % |
|---|---|---|---|---|
| Karite Butter (Shea) | 99.22 | 3.50 | 0.22 | 10% |
| Tallow, Beef | 347.28 | 12.25 | 0.77 | 35% |
| Rice Bran Oil | 248.06 | 8.75 | 0.55 | 25% |
| Ricinus Oil (Castor Oil) | 49.61 | 1.75 | 0.11 | 5% |
| Coconut Oil, 76 deg | 248.06 | 8.75 | 0.55 | 25% |
| Ingredient | Gram(s) | Ounce(s) | Pounds(s) | Batch % |
| Lye – NaOH 100% Purity (5% Superfat) | 137.86 | 4.86 | 0.30 | 9.68% |
| Water (33% Lye + 67% Water Solution) | 279.89 | 9.87 | 0.62 | 19.65% |
| Total Oils | 992.23 | 35 | 2.19 | 69.64% |
| Soap Weight (Pre-Cook) | 1,424.72 | 50.26 | 3.14 | 100% |
Fragrance:
- 2 oz of Floral Fragrance. I mixed equal parts of: Eden’s Garden Cybilla, Spice fragrance formulator and Musk fragrance formulator
Additives/ Colorants:
- 1.25 teaspoons of Synergy Mica from Nurture soap (or any teal color mica)
- 0.5 teaspoon of Azure blue mica (WSP) or any turquoise/light blue mica
- 0.5 teaspoons of Titanium Dioxide dispersed in 1 tablespoon of water
- Extra light colored oil to mix the micas (1-2 tablespoons)
For Decorations:
- Small flower mold (I made my own, but something like this would work)
- Hot pink / Fuchsia soap dough (I colored mine with Hollywood pink Mica from Nurture Soap)
- Yellow soap dough (optional)
If you do not have soap dough, you could buy some or make from the recipe found here). Allow three days for the soap dough to be ready if making it yourself.
Equipment:
PROCESS:
IF USING EMBEDS, AHEAD OF TIME:
For the flowers
Just take a small piece of pink soap dough and squeeze it and play with it until soft, then form into a ball and press it against the mold cavity. Wait about a minute and then pop it out.
If using yellow soap dough in the center: If your mold has a “core” where you could put the tiniest bit of yellow soap dough, do that, before adding the pink. Or you can add a small ball of yellow soap dough to the center of your flower after unmolding it. (Wet with brush dipped in water for better adhesion)
MAKING THE SOAP
- In a well ventilated area (outside or by a window), add the lye gradually to the distilled water. Do not breathe the fumes. You can freeze your water ahead to avoid fumes, and weigh the ice cubes. You need to wear your safety gear. Lye burns! You can prepare this several hours ahead, keep it properly covered.
- While you wait for the lye water to cool down, you can weigh and melt your oils, and weigh your fragrance oil into a glass container (fragrance oils can dissolve thin plastics)
- Mix teal and blue micas with a light colored oil like almond oil, using the mini mixer. Mix the Titanium dioxide with water.
- When your oils and lye solution are below 100°F (37.77°C) or cooler, add your lye solution to the oils slowly, to avoid splatters pour it on the blender shaft.
- Stir with the blender on Off position initially, then blend for 15 second periods, alternating with stirring, until it is almost emulsified. This takes about 50 seconds to 1 minute with this recipe.
- Pour out about 1 cup worth of the batter into a smaller container. This will be the white color, you can pour the Titanium dioxide on top of this, but do not blend it yet.
- Add the blue/teal micas to the remaining (larger) container with the batter, and blend until thoroughly dispersed.
- If your fragrance accelerates, like most florals do, take a moment now to make sure you have everything you need, and understand what to do next, before proceeding.
- Get your mold ready. You now have two options: (Step 10-12 or steps 13-16)
- THE EASY ROUTE: Blend the titanium dioxide into the smaller portion of the soap batter with your electric hand blender, set aside briefly.
- Add the fragrance to the teal portion, and blend for about 15-30 seconds until well distributed or until you reach light trace (if not achieved earlier).
- Add the white portion it to the teal batter in different sections (for an “in the pot” swirl design. You would then pour this entire mix on your mold, and go to step 16.
- THE RISKY ROUTE: This might give you an effect similar to what I got. Though I got there incidentally.
- Add the fragrance to the teal portion, and blend for about 15-30 seconds until well distributed or until you reach light trace (if not achieved earlier).
- Let the soap batter become thick in the container (It will take a minute or two with an accelerating fragrance, longer if your fragrance does not accelerate). Meanwhile, blend the titanium dioxide with the remaining soap batter. When the teal soap batter has the consistency of pudding on top, or of jello, Break it off with a large spoon, in a fairly fast motion, then pour and mix the fluid white soap batter. The idea is that the teal soap batter will split into chunky portions, then the white, which is fluid, will wrap itself around these chunks, creating the water pool effect. Check out the video below to see how it happened.
- Once the top is solid enough, put the flower embeds on top.
- Take pictures! There is no need to insulate the soap if your fragrance accelerates.
- After 8-10 hours start checking for hardness. Try releasing from one side of the mold, and if nothing sticks back, it is ready to be removed from the mold and cut.
You can watch the video of the making below:

1 thought on “Flowers at the Fountain Soap”